Chrome and Firefox have shifted from letting users know when they have a secure connection to announcing the insecurity of the sites you are visiting. This is just part of the shift on web from insecure HTTP to a bit more secure HTTPS. This protocol shift helps to make web browsing less vulnerable to eavesdropping and hijacking. But it’s a two-way street. The browsers can warn you about vulnerabilities, but it’s up to the websites to provide their pages in a secure fashion.
The technical aspects of serving HTTPS vs. HTTP are fairly straight forward. Get an SSL certificate signed by a publicly trusted certificate authority. Have the certificate and its associated intermediate chain of trust installed on your servers and/or CDN and you are set. There are typically costs associated with getting a publicly signed certificate. Prices range from a few hundred dollars to well over a thousand depending on the certificate authority, type of certificate, and other features like extended validation. You may not want nor be able to afford those costs.
For myself and my little blog, I’ve been using Let’s Encrypt certificates that are backed by the EFF. This marks my 3rd iteration attempting to automate managing these certificates on GitLab Pages. Each attempt moved the needle a bit more. The first method used a fragile expect script. The second was a bit better, but still required manual steps. Finally GitLab, Certbot, and myself have come a long way towards end-to-end automation.
To skip ahead, the repo with instructions are here: https://gitlab.com/shackledtodesk/gitlab-ssl-renew
Breakdown of Setup and Usage
GitLab Pages Domain Setup
If you haven’t already put in your custom domains into GitLab, now is
the time. Log into the GitLab web console. From your project, click
Settings on the left hand column, followed by Pages. 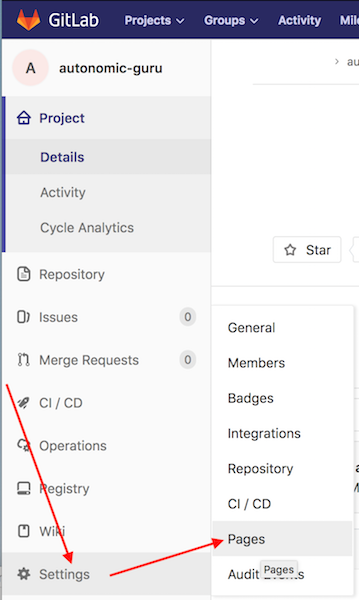
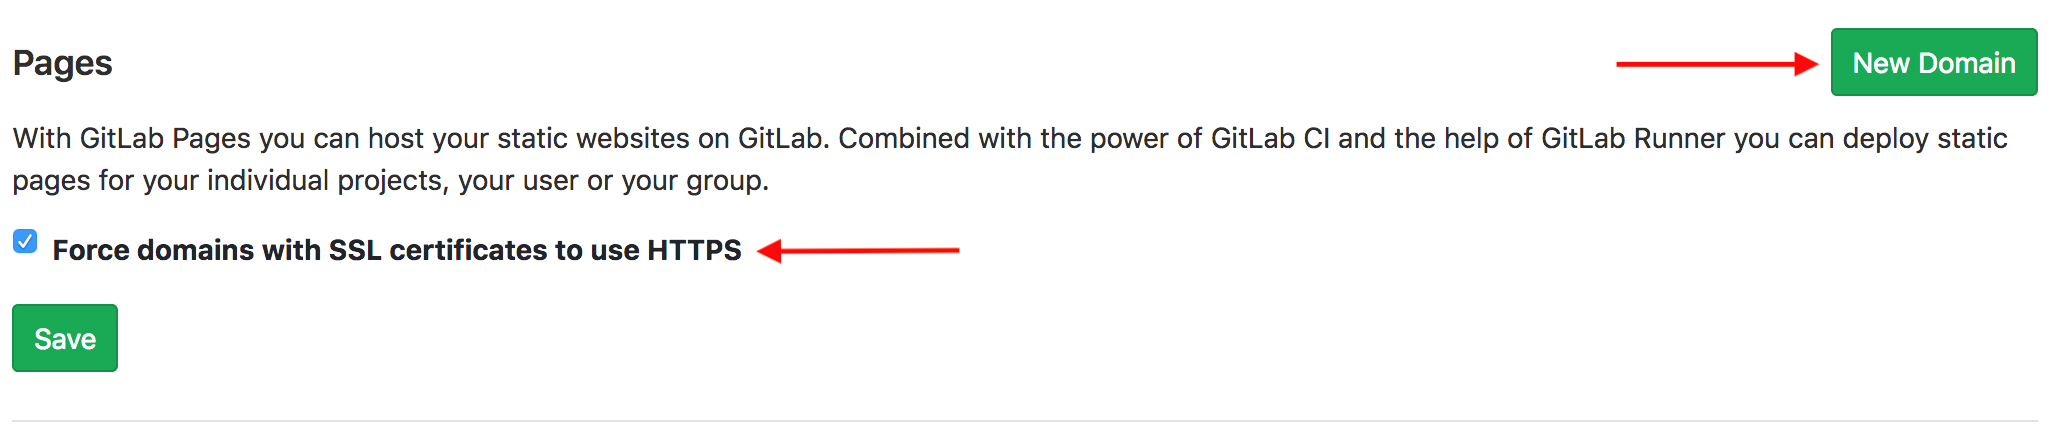
Add and verify each New Domain.
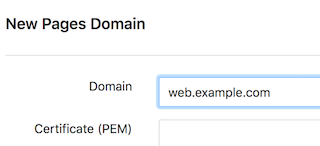
Enter domain name. If you already have a certificate chain, you can add it here as well.
You’ll need to update your DNS for the CNAME and TXT record as shown on the next page.
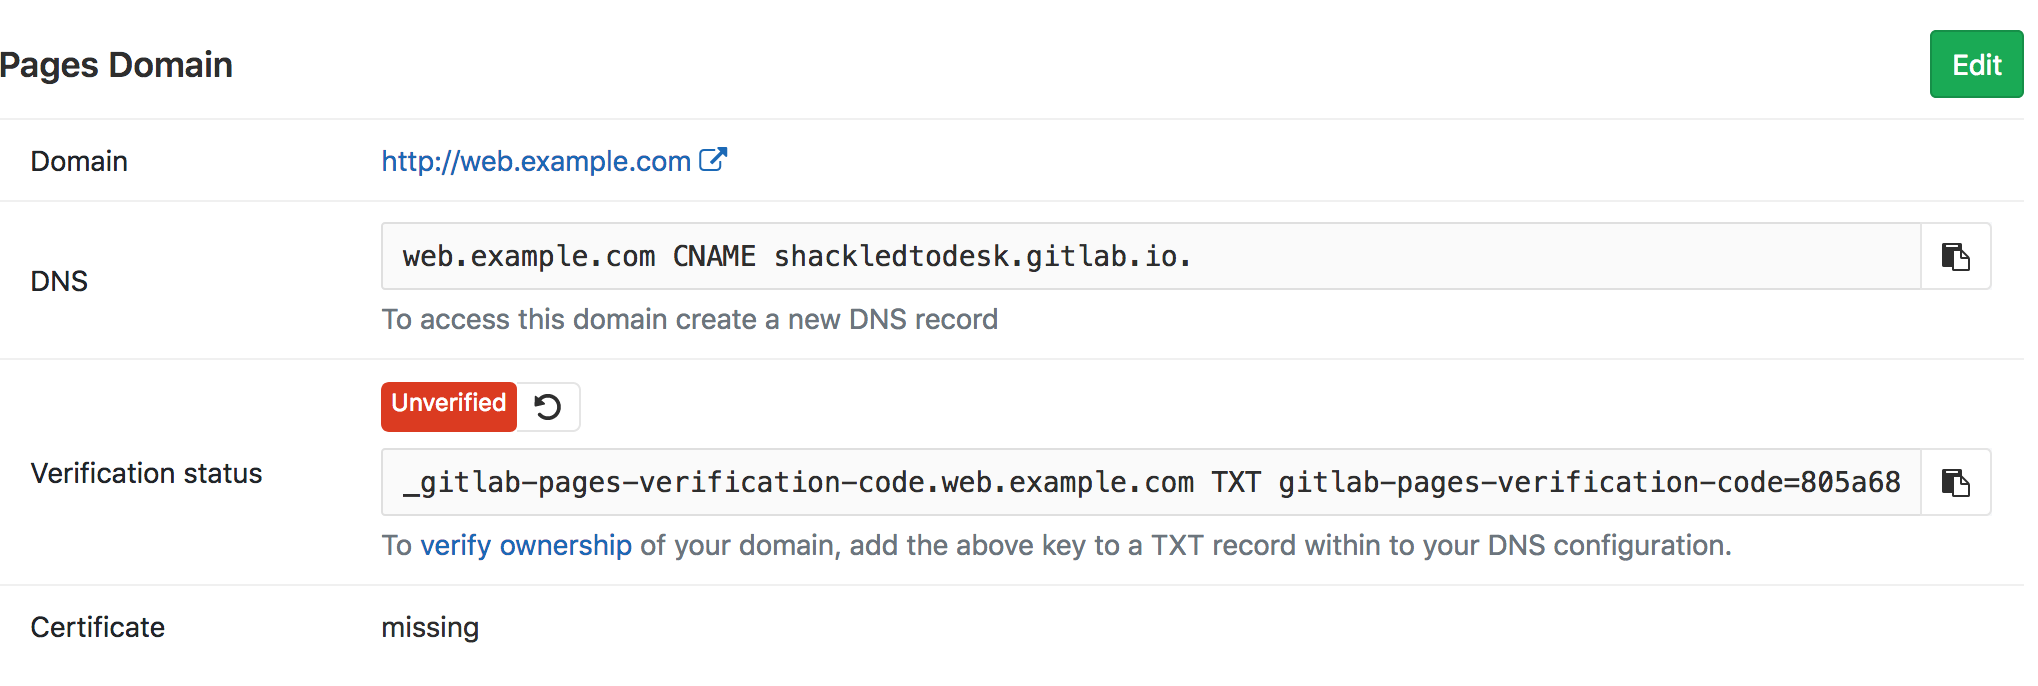
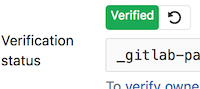
Once DNS has been updated and you can confirm propagation, then you can hit the reload icon next to the Unverified status to have GitLab check. If everything works out fine, then the status should change to Verified like below.
Record this list of domains that you’ve setup in GitLab for later. You’ll need this to configure CertBot.
GitLab CI/CD Setup
I’m using Jekyll as my blog to static file framework. If you are using something different, then your CI configuration will almost certainly be different. If you are doing something different, then you’ll need to configure your repository and CI configurations to perform the following actions:
- Add an
ledirectory to the base of your repository. This is where Certbot nonce files get stored before publishing. - Update your
gitlab-ci.ymlto copy nonce files to appropriate path for publishing so that they can be found athttps://yourdomain/.well-known/acme-challenge/.
For my Jekyll-based setup, I did the following in the root of my repository:
$ mkdir le
$ touch le/placeholder
$ git add le
$ git commit -a -m "Temporary Let's Encrypt directory used for validation files."
Modify your .gitlab-ci.yml file to add the following lines under the
script: directive.
  - mkdir -p public/.well-known/acme-challenge/
  - cp le/*  public/.well-known/acme-challenge/
Or as mine currently looks:
image: ruby:2.3

pages:
  script:
  - gem install json
  - gem install rouge
  - gem install jekyll
  - gem install jekyll-sitemap
  - gem install jekyll-feed
  - gem install jekyll-paginate
  - gem install jekyll-gist
  - jekyll build -d public
  - mkdir -p public/.well-known/acme-challenge/
  - cp le/*  public/.well-known/acme-challenge/
  artifacts:
    paths:
    - public
  only:
  - master
Now commit and push your changes to GitLab and validate that your build still works.
CertBot Configuration
Get a clone of the gitlab-ssl-renew repository and install the required dependencies.
For example:
$ git clone https://gitlab.com/shackledtodesk/gitlab-ssl-renew.git

Cloning into 'gitlab-ssl-renew'...
remote: Counting objects: 34, done.
remote: Compressing objects: 100% (32/32), done.
remote: Total 34 (delta 15), reused 0 (delta 0)
Unpacking objects: 100% (34/34), done.

$ brew install jq certbot

==> Downloading https://homebrew.bintray.com/bottles/jq-1.5_3.high_sierra.bottle.tar.gz
Already downloaded: /Users/andy/Library/Caches/Homebrew/jq-1.5_3.high_sierra.bottle.tar.gz
==> Pouring jq-1.5_3.high_sierra.bottle.tar.gz
ð  /usr/local/Cellar/jq/1.5_3: 19 files, 946.6KB
==> Installing certbot
==> Downloading https://homebrew.bintray.com/bottles/certbot-0.26.1.high_sierra.bottle.tar.gz
######################################################################## 100.0%
==> Pouring certbot-0.26.1.high_sierra.bottle.tar.gz
ð  /usr/local/Cellar/certbot/0.26.1: 2,409 files, 17.2MB

$ cd gitlab-ssl-renew
Create a CertBot INI file
Make a copy of the certbot-example.ini and edit to match your domains and environment.
logs-dir = /tmp/certbot/logs/
text = True
domains = example.com, www.example.com
email = admin@example.com
renew-by-default
keep-until-expiring
agree-tos
rsa-key-size = 4096
The list of domains is a comma delimited list of domains that you’ve
configured in GitLab. Ensure that the logs-dir exists and you have
permissions to write to it.
Update the CertBot Hook Scripts
The two scripts in gitlab-ssl-renew are used as CertBot
authorization and clean-up hooks. The authorization hook
(gitlab-auth-hook.sh) handles creating and publishing the nonce
files from CertBot. The clean-up hook (gitlab-put-certs.sh) uses
the GitLab API to publish the certificates to the Pages Domains you’ve
previously setup. You’ll need to modify these files to incorporate the
following information:
- Full path to local copy of your pages repository
- GitLab Project ID: Found under
Settings->General project - GitLab Personal Access token
- Path where CertBot will write live keys
In gitlab-auth-hook.sh update the setting GLDir with the full path
to your local repository copy. Make sure that you are currently
checked into the master branch to ensure publishing works when the
nonce files are pushed to the repository.
There are 4 changes needed for gitlab-put-certs.sh.
domainis the the first domain listed in your CertBot.ini file.- Example:
domain="example.com"
- Example:
liveDirwill be the path of yourgitlab-ssl-renewcheckout + /live/ directory.- Example:
certDir="/home/bob/gitlab/gitlab-ssl-renew/live/"
- Example:
- Set
glProjectIdto the GitLab Project ID number of your pages project.- Example:
glProjectId="123456"
- Example:
- Set
glTokenwith your Personal GitLab Access Token.- Example:
glToken="a2bc_efgHIJKlMnOpq"
- Example:
Running a Renewal
After all the prep-work, running the script should be simple. It’s a bit of a long command line, but it boils down to the following:
$ certbot certonly --manual --preferred-challenges=http -n --manual-public-ip-logging-ok --config-dir ./ --work-dir ./ --manual-auth-hook ./gitlab-auth-hook.sh --manual-cleanup-hook ./gitlab-put-certs.sh --config certbot.ini

Saving debug log to /tmp/certbot/logs/letsencrypt.log
Plugins selected: Authenticator manual, Installer None
Renewing an existing certificate
Performing the following challenges:
http-01 challenge for example.com
http-01 challenge for www.example.com
Output from gitlab-auth-hook.sh:
On branch master
Your branch is up to date with 'origin/master'.

nothing to commit, working tree clean

Error output from gitlab-auth-hook.sh:
Everything up-to-date

Output from gitlab-auth-hook.sh:
On branch master
Your branch is up to date with 'origin/master'.

nothing to commit, working tree clean

Error output from gitlab-auth-hook.sh:
Everything up-to-date

Waiting for verification...
Cleaning up challenges

Output from gitlab-put-certs.sh:
Updating certificate for: example.com
{
  "domain": "example.com",
  "url": "https://example.com",
  "verified": true,
  "verification_code": "47969277390e60fddc22a4e2efd46f83",
  "enabled_until": "2018-06-29T03:45:36.047Z",
  "certificate": {
[OUTPUT TRUNCATED]
  }
}
Updating certificate for: www.example.com
{
  "domain": "www.example.com",
  "url": "https://www.example.com",
  "verified": true,
  "verification_code": "bae004a790b116f18f54fc25dab9a983",
  "enabled_until": "2018-06-29T23:00:31.921Z",
  "certificate": {
[OUTPUT TRUNCATED]
  }
}


IMPORTANT NOTES:
 - Congratulations! Your certificate and chain have been saved at:
   /home/user/gitlab-ssl-renew/live/example.com/fullchain.pem
   Your key file has been saved at:
   /home/user/gitlab-ssl-renew/live/example.com/privkey.pem
   Your cert will expire on 2018-09-22. To obtain a new or tweaked
   version of this certificate in the future, simply run certbot
   again. To non-interactively renew *all* of your certificates, run
   "certbot renew"
 - If you like Certbot, please consider supporting our work by:

   Donating to ISRG / Let's Encrypt:   https://letsencrypt.org/donate
   Donating to EFF:                    https://eff.org/donate-le
That’s about it. Now just remember to run this every 90 days. I’ll leave running this as a scheduled process up to the reader.